01- Setting Up MetaMask Wallet
- Ensure you’ve installed the MetaMask wallet on your computer.
- Create a new MetaMask wallet address for this testing.
- Switch the MetaMask wallet’s network to the f(x)core testnet for testing. Here’s how:

02- Connecting to the Testnet
- Visit https://testnet-alo.marginx.io/.
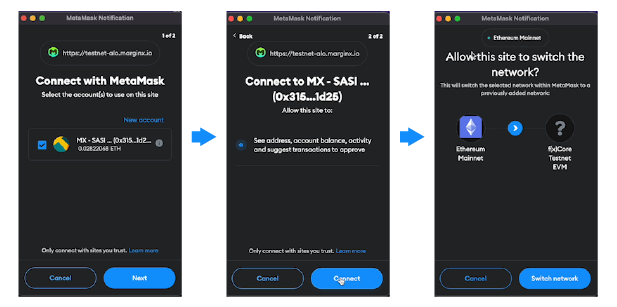
- Click on the “Connect Wallet” button located in the top right corner.
- From the pop-up, choose “MetaMask”.
- In the MetaMask pop-up, select the appropriate wallet address and grant permission for the connection.
- Upon successful connection, a prompt will appear to switch your MetaMask network to the f(x)core testnet. Click “Switch Network”.
03- Acquiring Test Tokens
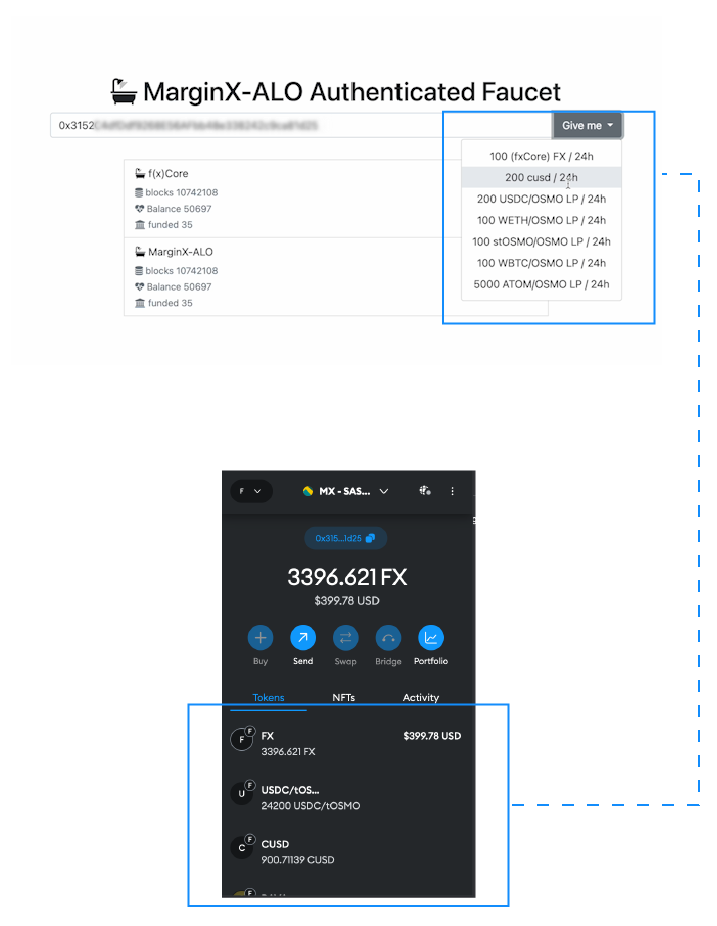
- Visit https://testnet-faucet.marginx.io/
- Input your wallet address (the same testing address which you will connect to Marginx.io)
- From the drop down select the test token you wish to receive and click on “Give me”
- You will be funded with the required test token. If tokens aren’t visible in your wallet, try refreshing or manually adding them to your wallet.
- Ensure to acquire all available test tokens to facilitate a comprehensive and diverse range of testing scenarios

How to Manually Switch to f(x)Core Testnet
If you’re encountering issues while trying to switch to the f(x)Core testnet, don’t worry! You can easily make this change manually by following these simple steps:
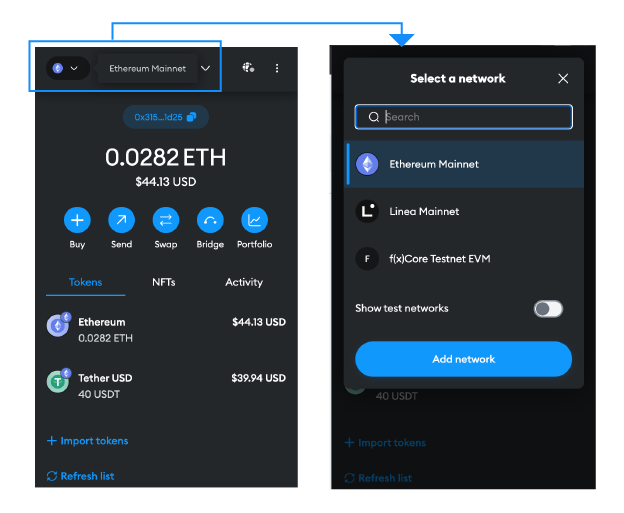
Step 1: Access the Network Dropdown
Navigate to the network dropdown located at the top left corner of your screen.
Step 2: Search for f(x)Core Testnet
Look through the list to see if “f(x)Core Testnet” is available.
Step 3: Add Network Manually (if necessary)
If “f(x)Core Testnet” is not visible in the list, proceed to add it manually.
Click on “Add a Network”.
Fill in the required information as prompted.
Network name
f(x)Core Testnet EVM
Network URL
https://testnet-fx-json-web3.functionx.io:8545
Chain ID
90001
Currency symbol
FX
Block explorer URL
https://testnet.starscan.io
Step 4: Save and Select f(x)Core Testnet
Ensure all the information is entered correctly.
Click “Save”.
Now, go back to the network dropdown and select the saved f(x)Core Testnet from the list.
And that’s it! You have successfully switched to the f(x)Core Testnet manually.
Accessing the Platform
- Head to https://testnet-alo.marginx.io/ . If not already connected, link your test wallet.
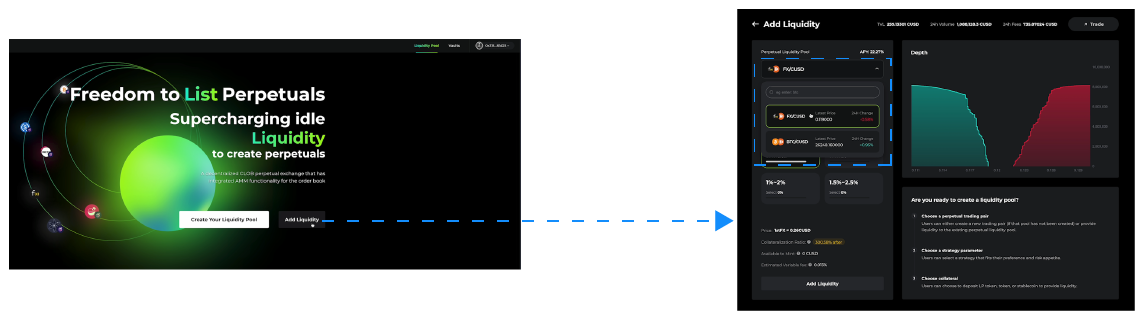
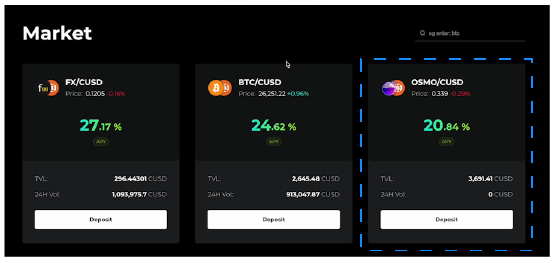
Adding Liquidity
- Click on “Add Liquidity” and choose the pool you wish to contribute to. You can also select a specific pool from the list of currently available ones. For this tutorial, we’ll use the FX / CUSD pool as an example.
Choosing LP Token and Amount
- From the dropdown list, select the LP token you intend to use as collateral.
- Input the amount you’d like to deposit or simply choose “Max” to deposit all your tokens.
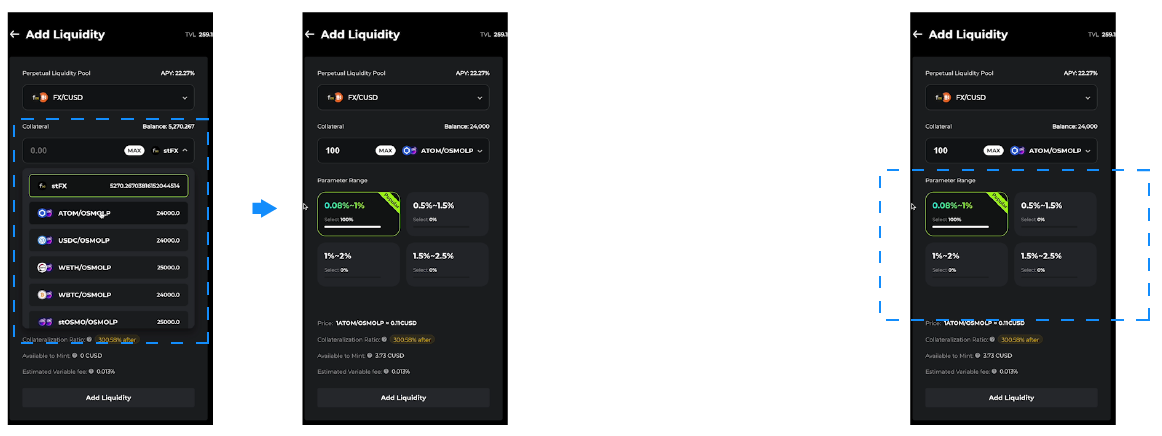
Selecting a Strategy
- Pick a strategy from the parameter range. Additional details about each range can be found in the description below.
- Ensure you understand the selected strategy before proceeding.
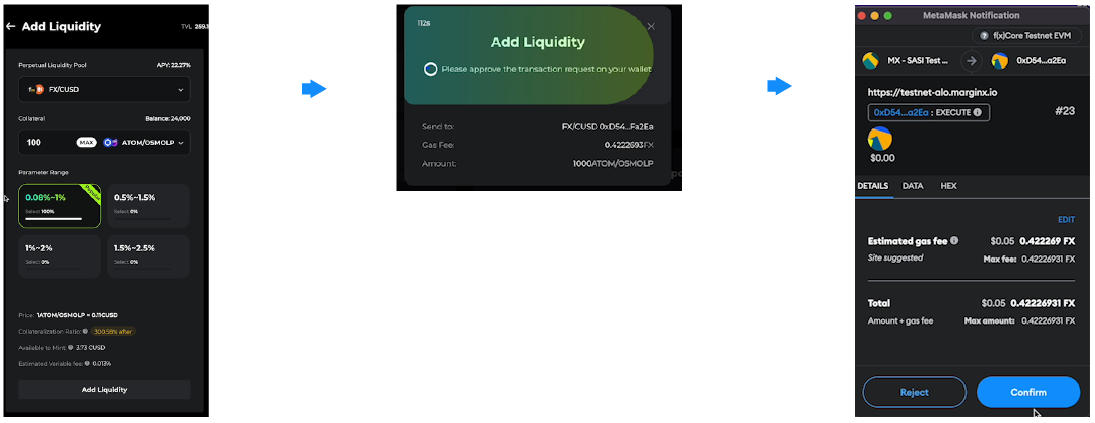
Completing the Deposit
- Click “Add Liquidity” to proceed and confirm the transaction. A notification will inform you once the transaction is successfully completed.
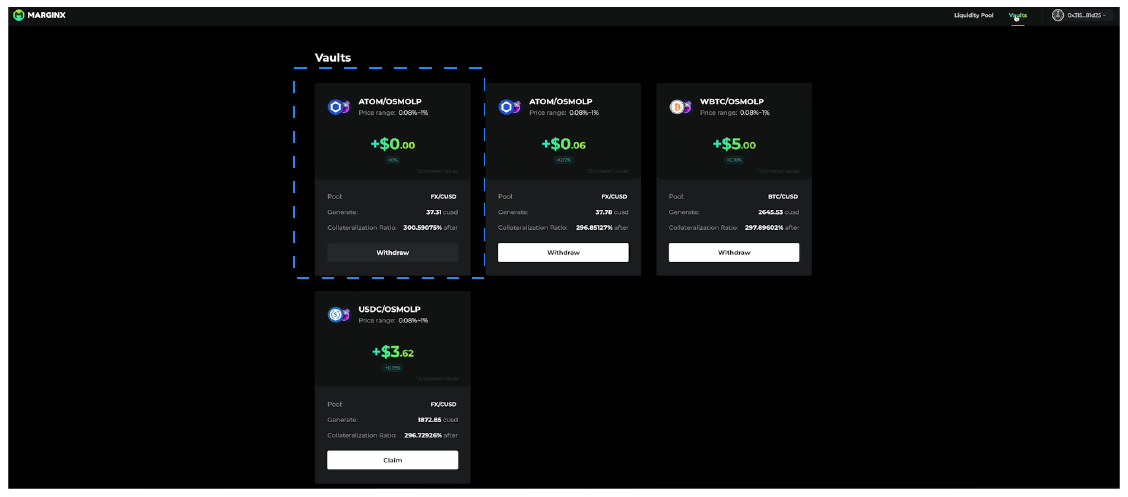
Viewing Your Deposits
- All your deposits can be easily viewed under the “Vaults” section.
Conclusion
- You’ve successfully deposited into a pool and selected a strategy! Monitor your investments and make informed decisions to optimize your returns.

Initiating the Process
- Begin by visiting https://testnet-alo.marginx.io/ . Ensure your test wallet is connected; if not, take a moment to link it.
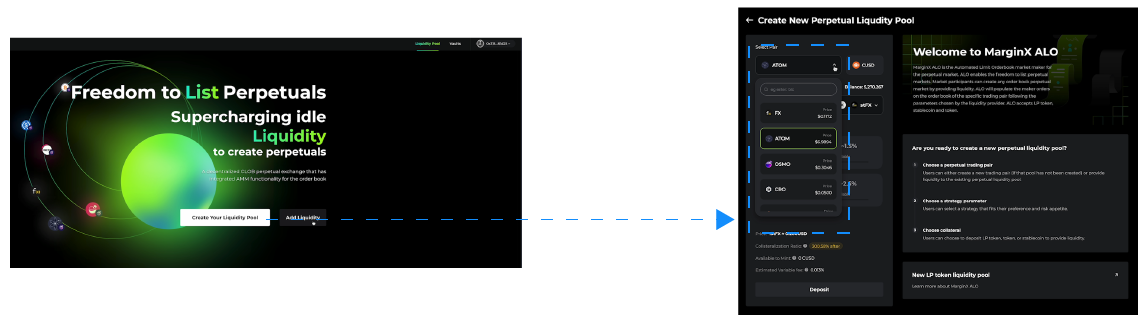
Creating the Liquidity Pool
- Click on the “Create Your Liquidity Pool” button to start the process.
- Choose a token from the dropdown list to pair with CUSD.
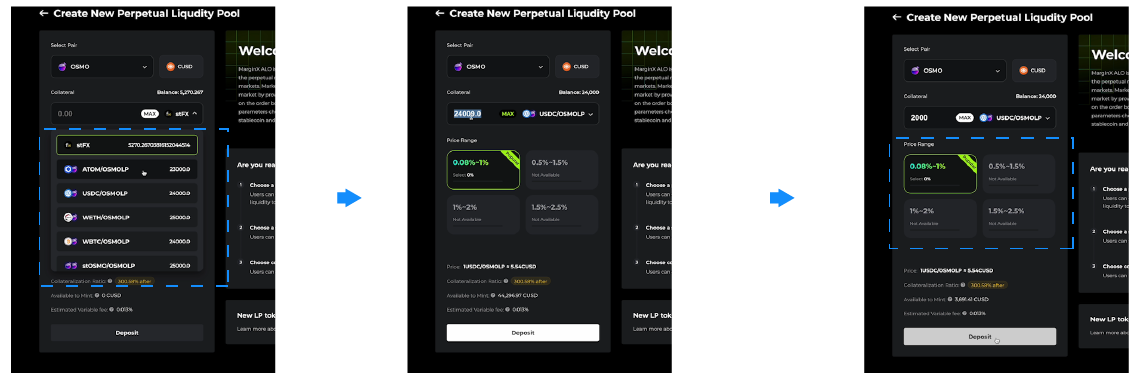
Setting the Collateral
- Net select the Collateral LP token form the collateral dropdown list .
- Ensure the selected token is compatible as not all LP tokens can serve as collateral for selected pair.
- Input the collateral amount you wish to commit to the pool. Be mindful of the pair compatibility and ensure your selection aligns with the available options.
Strategy Selection
- Choose a strategy from the parameter range. More information on each strategy is available in the description below, aiding you in making an informed decision.
- Review and ensure comprehension of the selected strategy before moving forward.
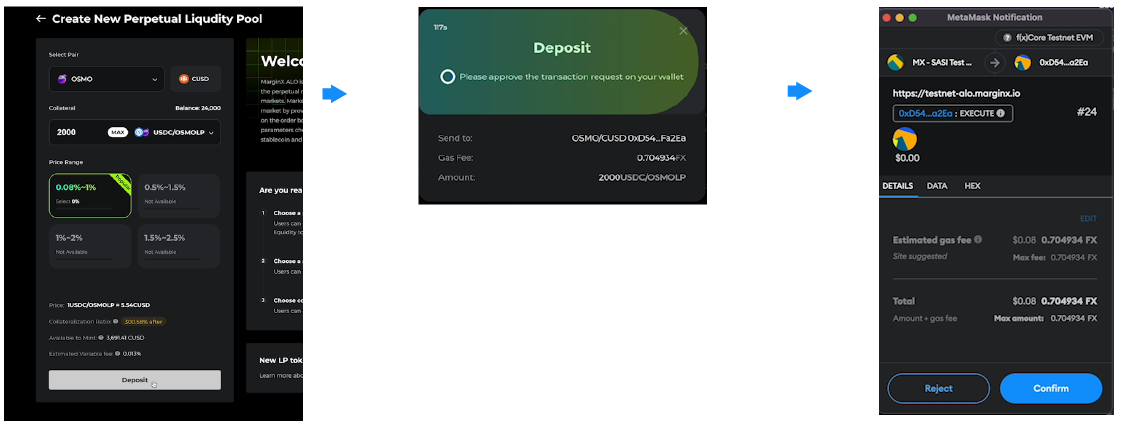
Finalizing the Creation
- Click “Deposit” and confirm the transaction in your wallet. A notification will pop up once the transaction is successfully completed, signalling the creation of your liquidity pool.
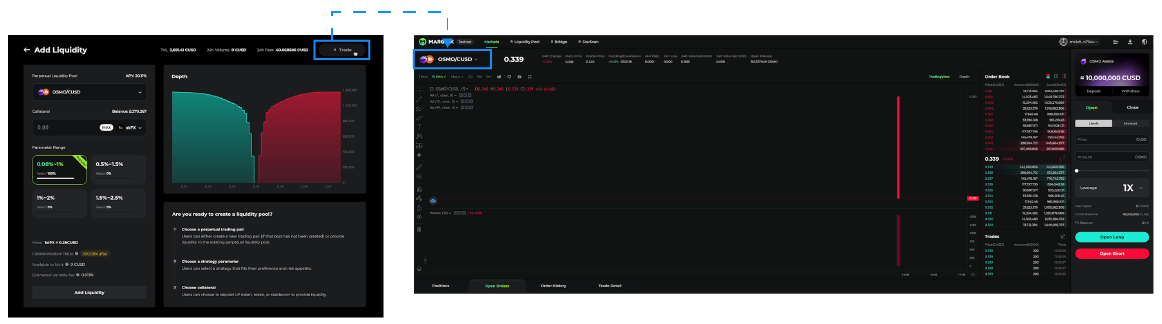
Viewing and Trading in the New Pool
- Your newly created pool will be visible under the “All Pools” section. You can select it for an overview or initiate trades directly on the trading site.
Conclusion
- Congratulations! You’ve successfully created a new liquidity pool. Explore, trade, and maximize the opportunities your new pool presents.
Accessing Your Investments
- Navigate to https://testnet-alo.marginx.io/. If your wallet is not yet connected, please do so to proceed.
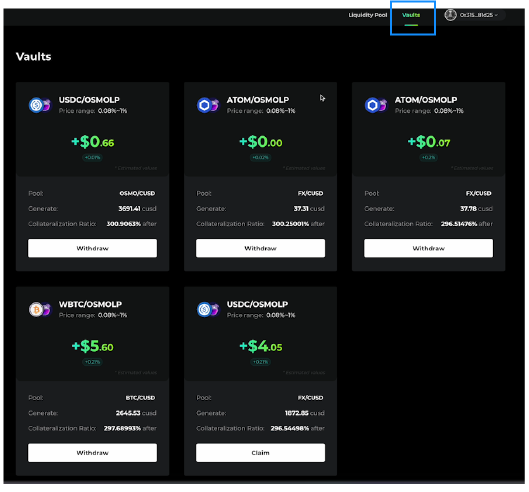
Locating Your Vaults
- Click on the “Vaults” tab where you’ll find a comprehensive list of all your investments and collaterals.
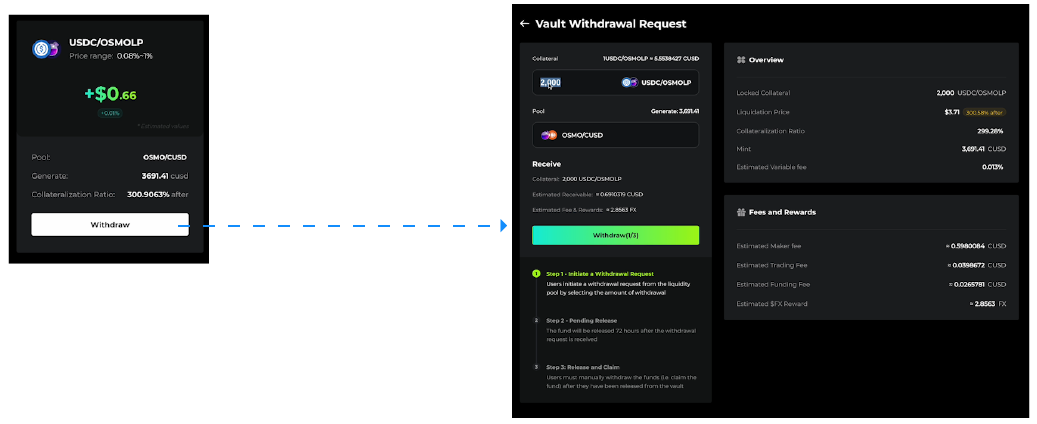
Initiating Withdrawal
- Identify the pool you wish to withdraw from and click “Withdraw”.
- Review all the information to ensure accuracy before proceeding.
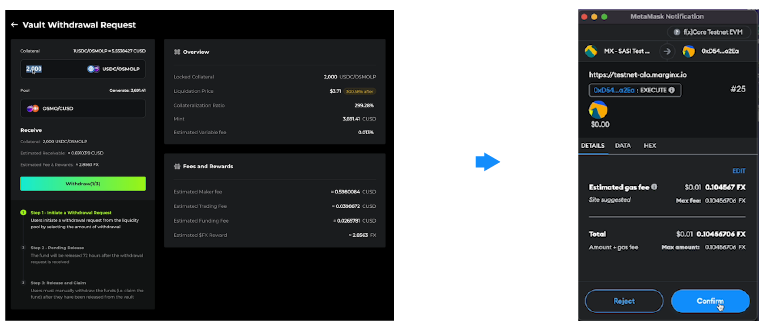
Confirming the Withdrawal
- Click “Withdraw” again and confirm the transaction in your wallet. This initiates the first step of the three-step withdrawal process.
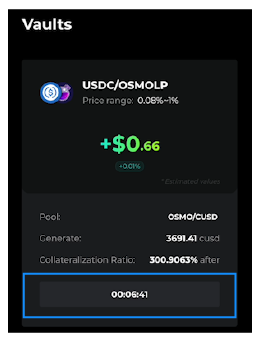
Waiting Period
- The second step involves a waiting period for the funds to be released. This duration can extend up to 72 hours, depending on the specific pool.
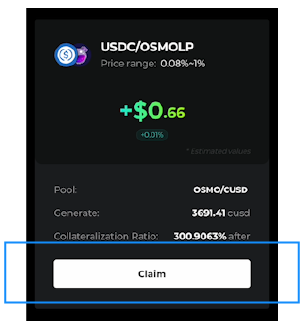
Claiming Your Funds
- Upon the release of funds, return to the “Vaults” tab.
- Click the “Claim” button corresponding to your pool. Confirm the transaction to receive your funds directly into your wallet.
Conclusion
- You’ve successfully closed your investment and withdrawn your funds. Always review the withdrawal terms for each pool to manage your investments effectively.